Wednesday, September 30, 2009

VirtuaWin Settings

I found a useful virtual desktop manager called VirtuaWin on SoureForge. The following is my VirtuaWin settings.


VirtuaWin general settings

I use 4 desktops horizontally. Desktop wrapping is enabled so that going eastward from the fourth desktop will lead to the first desktop.


Virtuawin Hotkeys

Holding down Alt+Win and pressing F1, F2, F3, F4 will allow me to switch to the first, the second, the third and the fourth desktop respectively.


virtuawin_mouse

Holding Shift down and moving the mouse cursor against an edge of the screen will allow me to switch desktops.

Tuesday, September 29, 2009

GRUB: Booting and Activating Windows Vista/7

This post describes a way to activate Windows Vista/7 with Grub and SLIC loader. In order to successfully activate Windows Vista/7, you essentially need the following 3 things.


  • OEM SLIC code

    Every SLIC code is 374 bytes. It can be extracted from the BIOS by using the SLIC Dump ToolKit on a PC running legitimate Windows.
  • OEM Certificate (*.xrm-ms) that matches with the corresponding SLIC code
  • Valid 25-digit Windows key


Once these 3 things are obtained, you need a program to insert the SLIC code into memory to emulate OEM BIOS. I found an executable file called wow.exe whose job is to insert a SLIC code into BIOS. Also, GRUB.EXE is needed to find Windows partition and to boot Windows.


Because wow.exe and grub.exe are DOS executables, DOS should be booted first and run wow.exe and grub.exe in turn. grub.exe will chain-load Windows bootmgr, and then Windows will start. FreeDOS is preferred to MS-DOS because it works better with GRUB. Download a floppy image containing FreeDOS kernel and FreeCOM command processor below.


Inserting SLIC data into wow.exe with XVI32


wow.exe has a SLIC table embedded in itself beginning at $A58. Start XVI32 and open wow.exe. Start another XVI32 and open a SLIC table which should be 374 bytes.

With the XVI32 window showing a SLIC.table, open the Edit menu, click the beginning of file, select Block mark from the Edit menu, go to the end of file and select Block mark again. Open the Edit menu, open the Clipboard submenu and select Copy.

With the XVI32 window showing wow.exe, go to $A58, open the Edit window, select Block <n> chars..., enter 374 and click OK. Select Block delete from the Edit menu. Then, open the Edit menu, open the Clipboard submenu, and choose Paste. Go to $A38 and select Overwrite string... and enter the new 14-character OEM identifier which should match the string starting at $A62. Save the file wow.exe.


Open the FreeDOS floppy image with WinImage. Insert wow.exe into the floppy image. Create a batch file called AUTOEXEC.BAT with a text editor and put the following contents in it.


@ECHO OFF
WOW
GRUB

Save the file AUTOEXEC.BAT and insert in into FreeDOS floppy image.


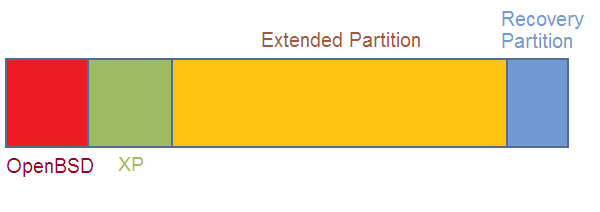
Assuming that Windows 7 is installed, open a Command Prompt as administrator. Create an arbitrary file in C:\Boot, for example, with the filename win7. This file will be used to find the Windows partition (useful in mutiple-Windows environment).


copy nul C:\Boot\win7

Then, create a new text file MENU.LST with the following contents:


timeout 0
default 0
fallback 0
hiddenmenu

title Windows 7
find --set-root /boot/win7
chainloader /bootmgr

Save the file as MENU.LST and insert it into the floppy image with WinImage. Save the floppy image and quit WinImage.


With GRUB installed into MBR, type the following GRUB commands at boot time to boot Windows with BIOS-inserted SLIC code. Assume memdisk and freedos.flp is in the (hd0,3) partition.


kernel (hd0,3)/boot/grub/memdisk
initrd (hd0,3)/boot/grub/freedos.flp


Activating Windows


Once Windows has started, find the OEM certificate (*.xrm-ms) and 25-character Windows key that match the SLIC table just loaded into BIOS. Open a command prompt as administrator and type the following commands to activate Windows:


slmgr -ilc oemcert.xrm-ms
slmgr -ipk XXXXX-XXXXX-XXXXX-XXXXX-XXXXX

Hopefully, Windows will be activated.

Saturday, September 26, 2009

Setting Up Windows Recovery Environment with Bootmgr

After installing Windows 7, I found Winre.wim in C:\Recovery folder. I wanted to create a separate recovery partition and set it up so that it will boot to Windows Recovery Environment. So I created a new primary partition formatted in NTFS. I rebooted with Windows 7 DVD, chose “Repair Your Computer.” and opened a Command Prompt. I typed the following commands:


C:
bootrec /fixboot
copy D:\bootmgr C:\
robocopy D:\Boot C:\Boot /E
robocopy D:\Recovery C:\Recovery /E

D: is the Windows 7 partition. I used bcdedit in the following way to enable Windows Recovery Partition:


bcdedit /create /d "Windows Recovery Environment" /application osloader
bcdedit /set {13800a57...} device ramdisk=[C:]\Recovery\Winre.wim,{ramdiskoptions}
bcdedit /set {13800a57...} osdevice ramdisk=[C:]\Recovery\Winre.wim,{ramdiskoptions}
bcdedit /set {13800a57...} path \Windows\System32\winload.exe
bcdedit /set {13800a57...} systemroot \Windows
bcdedit /set {13800a57...} winpe yes
bcdedit /displayorder {13800a57...} /addlast

Here, the UUID's have been abbreviated. However, Windows Recovery Partition seemed to be loading for a few seconds, then crashed with blue screen.

Creating a Bootable USB Thumb Drive

Most modern computers allow booting from a USB thumb drive. However, creating a bootable USB drive can be a tricky task because different BIOS may assign different hexadecimal designators for a USB drive, depending on computers and situations. For example, my laptop assigns 0x80 to the internal hard drive and 0x81 to a USB drive when the computer boots from the internal hard drive as usual. However, if I choose to boot from my USB thumb drive at the BIOS boot menu after pressing Esc, the BIOS assigns 0x80 to the USB drive and 0x81 to the hard drive.


Booting from external storage, such as a USB drive or SDHC card, allows one to start an operating system externally, freeing oneself from the limitations of an internel hard drive. In this post, I show heterogenous methods to create a bootable USB drive.


Partitioning a USB drive


Most USB thumb drives have only one partition. If you are happy with just one partition, that's fine. But if you want to slice your USB drive into multiple partitions, I recommend you to use GParted. To download and use GParted, get a bootable ISO from the following links and burn it with CD burning software, such as CDBurnerXP.


I partition my USB drive in order to install Linux on it. Usually, I make 2 partitions (one FAT16 partition and one EXT2 partition). Sometimes, I create another partition that I format as Linux swap. Here's my typical partition layout for USB thumb drives.


/dev/sdb1 FAT16 or FAT32
/dev/sdb2 EXT2, EXT3 or JFS
/dev/sdb3 Linux Swap


Installing MBR


Setting up MBR (short for master boot record) correctly is crucial in creating a bootable USB drive. In this post, I use the Debian/Ubuntu mbr package to set up MBR on my USB thumb drive.


Use the install-mbr command from the mbr package to install a functional master boot record.


install-mbr /dev/sdc -v --drive 0x80 --enable +12


Making FAT partitions bootable


FreeDOS kernel and FreeCOM


Originally, my 256MB USB thumb drive has only one primary partition formatted in FAT16. Since it's not feasible to install Windows on USB thumb drives, I installed a FreeDOS kernel on my USB thumb drive. I downloaded FreeDOS kernel and FreeCom command shell. I booted FreeDOS using a FreeDOS floppy. Then, I installed kernel.sys and command.com just to have a bootable DOS.


sys D /update /oem:fd
copy command.com D:

Restart your computer with the USB thumb drive still plugged in. Press the key for displaying the BIOS boot menu. This key may be Esc or F12. Select your USB drive from the menu. Hopefully, you'll reach the FreeDOS command prompt.


Syslinux


Syslinux can be installed on either FAT or EXT2 partition. Syslinux provides a versatile multi-boot functionality, comparable to GRUB. In Linux, I used the following command to make the FAT partition bootable with syslinux.


syslinux /dev/sdb1

This command copies ldlinux.sys to the FAT partition.

Monday, September 21, 2009

To Create Windows Vista/7 Boot Floppy

Windows Vista and Windows 7 are overly complicated pieces of software, and thus bring a bunch of boot problems with them. In preparation for such problems, it is wise to create a boot floppy for Windows Vista or Windows 7. Floppy drives are hard to find in new computers, and are being phased out in favor of USB thumb drives. If your computer doesn't have a built-in floppy drive, you can get a USB floppy drive and use it to create a boot floppy. If you don't have a floppy drive, download a floppy image from the links below and use it with a bootloader, such as GRUB.


To create a Windows Vista/7 boot floppy, follow these steps:


  1. Insert a blank floppy diskette into your floppy drive. If your floppy drive is a USB type, connect it to your computer.
  2. Click Computer in the Start menu. This opens Computer in Windows Explorer.
  3. Right-click on Floppy Disk Drive (A:) and choose Format... from the menu.
  4. Click Start in the Format window.
  5. Copy C:\bootmgr to A:\. The file bootmgr is also located on Windows Vista/7 installer CD. You may have to unhide bootmgr before copying it if it is hidden.
  6. Create a new folder A:\BOOT.
  7. Open a Command Prompt and run the following commands to copy C:\BOOT\BCD.

    bcdedit /export A:\BOOT\BCD

  8. Reboot your computer with the boot floppy. You'll be able to get back to Windows Vista/7.


For those who can't create their own boot floppy for lack of a floppy drive, here's my boot floppy image:


You can use it with GRUB like this:


kernel (hd0,4)/boot/grub/memdisk bigraw
initrd (hd0,4)/boot/grub/vstaboot.bin
boot

memdisk is a part of Loadlin package. Note that this image is specific to my Vista installation. You must edit it with bcdedit before using it:


bcdedit /enum /store A:\Boot\BCD
bcdedit /store A:\Boot\BCD /set {bootmgr} device partition=C:
bcdedit /store A:\Boot\BCD /set {default} device partition=C:
bcdedit /store A:\Boot\BCD /set {default} osdevice partition=C:

Saturday, September 19, 2009

Linux: Building RipOff 0.8.3

I am building RipOff which is a GTK+ application that rips Audio CD's. RipOff depends on GTK+ 2.4 and up, libcdio, libcddb, libogg, libvorbis, Lame and FLAC. Let's first build RipOff dependencies:


  1. Install the following packages:


    • libcddb2-dev
    • libflac-dev
    • libgtk2.0-dev
    • libogg-dev
    • libvorbis-dev
    • libxml2-dev

  2. RipOff 0.8.3 requires glib 2.8 and up. If the version of glib is too old, you have to build glib yourself.

    ./configure --prefix=/usr --disable-shared --disable-debug
    make
    make install

  3. Download the libcdio source and compile it:

    tar xzvf libcdio-0.82.tar.gz
    cd libcdio-0.82
    ./configure --prefix=/usr --disable-shared
    make
    make install

  4. If libcddb2-dev package is not available, download the libcddb source and compile libcddb:
    tar xzvf Downloads/libcddb-1.3.2.tar.gz
    cd libcddb-1.3.2/
    ./configure --prefix=/usr --disable-shared
    make
    make install

  5. Compile LAME as follows:


    ./configure --prefix=/usr --disable-shared
    make
    make install

  6. Build RipOff as follows:


    ./configure --prefix=/usr
    make
    make install

    The following files are installed by RipOff:


    /usr/bin/ripoff
    /usr/include/ripoff/RipOff.h
    /usr/include/ripoff/RipOffConfigFile.h
    /usr/include/ripoff/RipOffPluginRawInterface.h
    /usr/include/ripoff/RipOffTrack.h
    /usr/include/ripoff/config.h
    /usr/lib/libripoff.a
    /usr/lib/libripoff.la
    /usr/lib/libripoff.so
    /usr/lib/libripoff.so.0
    /usr/lib/libripoff.so.0.0.0
    /usr/lib/ripoff/plugins/libflac.so
    /usr/lib/ripoff/plugins/liblame.so
    /usr/lib/ripoff/plugins/libvorbis.so
    /usr/lib/ripoff/plugins/libwav.so
    /usr/share/applications/ripoff.desktop
    /usr/share/pixmaps/ripoff.xpm

Thursday, September 17, 2009

Using GRUB To Boot Windows XP with a Floppy Image

I had trouble booting Windows XP installed in a logical partition. I guess the boot sector of the logical partition was damaged. I had to boot this installation of Windows XP by chainloading from another Windows XP on a primary partition. But without another Windows XP partition, I can boot Windows XP from a floppy diskette although floppy diskettes are not in much use nowadays.


I created a Windows XP boot floppy by following instruciton on this article on the Microsoft site. Then, I booted Linux and made an image file of the boot floppy.


dd if=/dev/fd0 of=ntboot.bin bs=512

Save the image file somewhere in your hard drive. Then, when you start the computer, use the following GRUB commands to boot Windows XP.


kernel (hd0,6)/boot/grub/memdisk bigraw
initrd (hd0,6)/boot/grub/ntboot.bin

memdisk is a part of the syslinux package.


Here's my XP boot image to be used with GRUB or syslinux: ntboot.bin. Before actually using it, make sure to edit BOOT.INI in it.

Wednesday, September 16, 2009

GRUB and NTFS boot sector

After messing with the hard disk partitions, Windows XP installations in logical partitions failed to bootstrap directly. However, I finally managed to boot Windows XP on a logical partition by chainloading from another XP on a primary partition. This required me to edit the file BOOT.INI on the primary XP partition.


I suppose the boot sector of the logical partition is broken. I booted Linux and extracted the boot sector from the primary partition containing Windows XP.


dd if=/dev/sda2 of=xpboot.bin bs=512 count=1

I experimented with this boot sector and GRUB. At boot time, I typed the following GRUB command.


chainloader (hd0,5)/xpboot.bin
boot

This allowed me to boot Windows XP. However, the XP boot sector apparently reads BOOT.INI from the primary partition. I will analyze the boot sector file with an Hexadecimal editor. By studying the NTFS boot sector, I will be able to solve Windows XP boot problems.

Linux: Installing Windows Vista/7 Wireless Driver for use with ndiswrapper

I booted Linux on my Toshiba Mini NB205 netbook. My Linux system is installed on a USB memory stick and I boot it by plugging it in and using GRUB to load the Linux kernel and a custom initrd image. My Linux system doesn't have network connection yet because it doesn't have the driver for Atheros AR9285 wireless LAN adapter. It can't start X Windows either because I haven't installed the X.org driver package for Intel chipsets yet. Once I set up my wireless connection, I'll update my system, install the Intel video driver, and then set up X Windows.


I tried to install the Windows driver for my Atheros Wireless LAN card which will be loaded by ndiswrapper. First, I had to mount the NTFS partition which is hosting my Windows 7 system.


fdisk -l /dev/sda
mount -t ntfs-3g /dev/sda1 /mnt

I changed my working directory to DriverStore/FileRepository.


cd /mnt/Windows/System32/DriverStore/FileReposity

I tried to find the Vendor ID and Device ID of my wireless LAN card by reading the output of lspci -nn.


lspci -nn

The command above gave me the following output.


03:00.0 Network Controller [0280]: Atheros Communications Inc. AR9285 Wireless Network Adapter (PCI-Express) [168c:002b]

In order to make it easy to find the driver for my wireless LAN card, I created a script file /usr/local/bin/findmydrv.sh with the following contents:


#!/bin/sh
FILETYPE=`file $1`
case "$FILETYPE" in
*UTF-16*)
iconv -f utf16 -t utf8 $1 | \
grep -i $2 | \
grep -iq $3 && \
echo "Found the driver for your device $2:$3 in $1"
;;
*)
grep -i $2 $1 | \
grep -iq $3 && \
echo "Found the driver for your device $2:$3 in $1"
;;
esac

Then, I used the following command.


find -type f -iname \*.inf -exec findmydrv.sh \{\} 168c 002b \;

The previous command will show the location of the .INF file that contains the driver setup information. Once I found the folder that contains the Atheros driver, I went there and installed the driver.


cd netathr.inf_x86_neutral_*
ls -l
ndiswrapper -i netathr.inf

I checked whether the driver was successfully installed by running:


ndiswrapper -l

This displayed the following.


netathr : driver installed
device (168C:002B) present

I tried the newly installed Windows driver.


modprobe ndiswrapper


Related Posts


Sunday, September 13, 2009

Booting Windows Vista/7 From a Logical Partition

It is possible for Windows Vista and Windows 7 to be installed on logical partitions. Windows Vista and Windows 7 use the new bootmgr bootloader to start themselves as opposed to ntldr used by old NT-based operating systems like Windows XP. Therefore, booting Windows Vista/7 from a logical partition takes a different approach from booting Windows XP from a logical partition.


Installing Windows Vista/7 onto a Logical Partition


Windows Vista/7 can be installed into a logical partition at the time of first installation. However, a new primary NTFS partition will be created. This partition is about 100 MB and only contains essential bootloader files, such as bootmgr and BCD. If you intend to remove this Vista/Win7 boot partition, be sure to copy its contents (especially bootmgr and BCD) to the logical partition containing Windows Vista/7 beforehand.

After that, reboot with Vista/Win7 installer CD, choose “Repair Your Computer” and proceed to invoke the Command Prompt. Type the following commands to enable Vista/Win7 to boot from a logical partition.


C:
bcdedit /enum /store C:\Boot\BCD
bcdedit /store C:\Boot\BCD /set {bootmgr} device partition=C:

Restart your computer. Put a CD into CD-ROM that has GRUB bootloader. Most Linux install CD's use GRUB these days. When you see the Grub boot menu, press C or Esc. You are now on the GRUB command line. To find which partition is your Windows partition, type root (hd0, and then press Tab. Windows partitions are mostly type 7. For example, if your Windows partition is (hd0,5), type the following commands to boot Windows.


root (hd0,5)
chainloader +1
boot

The reason why we want to remove the boot partition is most likely because we want to free a primary partition for use by another OS, such as OpenBSD or OpenSolaris. However, in order to boot Windows from a logical partiton, you need to set up a special bootloader, for example, GRUB.


Copying Windows Vista/7 from Primary to Logical Partition


If you installed Windows Vista/7 on a primary partition and want to move it to a logical parition, we need GParted to manipulate partitions. To get GParted, I recommend you to download one of the following ISO's:


Use GParted to copy Windows Vista/7 from a primary partition to a logical partition. Then, delete the original primary partition containing Windows Vista/7. Grab your Windows Vista/7 install DVD and reboot your PC with it. Click “Repair Your Compure” option and open a Command Prompt. Type the following commands to fix the C:\Boot\BCD file.


C:
bcdedit /enum /store C:\Boot\BCD
bcdedit /store C:\Boot\BCD /set {bootmgr} device partition=C:
bcdedit /store C:\Boot\BCD /set {default} device partition=C:
bcdedit /store C:\Boot\BCD /set {default} osdevice partition=C:

Reboot. Use the following GRUB commands to start Windows Vista/7. In this example, (hd0,5) is the logical partition that has Windows Vista/7.


root (hd0,5)
chainloader +1
boot


Validating the System Restore Drive


After booting Windows Vista/7, open the System Properties dialog and make sure that the Available Disks in System Protection tab are all valid.


System Protection Tab

Related Posts


Saturday, September 12, 2009

My Partitioning Strategy

Synopsis


  • Partitioning shall be done with Partition Magic, Acronis Disk Director or GParted. GParted is the preferred tool. However, compatibility of the partition table is important between different partitioning tools.
  • The current and the past partition layout must be kept on an external media at all time. This layout is produced by the command “fdisk -l -u /dev/[sh]d?” in Linux. The resulting file can be read by a text editor.
  • The MBR shall contain the boot code installed by Debian's mbr package.
  • The first primary partition shall be about 96MB in size, formatted FAT16 and installed with SYSLINUX bootloader and FreeDOS.
  • Another primary partition shall host OpenBSD or Windows XP.
  • One extended partition will be reserved to host any number of logical partitions containing OS, swap and data.
  • The first logical partition inside the extended partition will always be Linux swap for hibernation usage. The second logical partition will be Linux swap exclusively.
  • After Linux swap, the order of logical partitions shall be Linux partitions, Windows partitions and FAT16/FAT32 partitions containing personal data.


Limitation of PC partition table


As I expect to install and explore multiple OS on a single hard drive, I realize the difficulties caused by partitioning limitations. The major limitation is that we can only have up to 4 primary partitions. However, we need a single extended partition so that we can have more than 4 partitions — an extended partition can contain an infinite number of logical partitions in itself. Thus, my final partition layout would have 3 primary partitions and one extended partition.


Recovery Partition


Most manufactured computers have Windows pre-installed. The trend today is that PC vendors (HP, Compaq, Dell, Toshiba etc.) provide a system recovery partition so that users can restore their system back to the factory state in problematic occasions. I don't recommend anyone to remove or erase the System Recovery partition for any reason — even if he actually bought an expensive retail box of Microsoft Windows CD/DVD. Thus, with an intact System Recovery partition (which is a primary partition because it must boot up with a custom Windows installer), we can only have up to 2 primary partitions and one extended partition for our own use.


My Hard Drive Partition Layout

The vendor-provided Recovery partition shall never be removed, but it can contain custom boot codes (for example, GRUB). Assuming that the Recovery partition is formatted as FAT filesystem, you can install GRUB into the Recovery partition so that you can have a nice boot menu for you to choose an OS from when you turn on your PC. If the Recovery partition is formatted as NTFS, GRUB for DOS should be installed instead because the original GRUB cannot natively read NTFS. Alternatively, GRUB can be installed into a logical partition.


There's a way to create a custom Windows XP OEM CD from the System Recovery partition, as explained on howtohaven.com. Once you've created a Windows XP OEM CD, you may remove the Recovery partition at your own peril.


Extended Partition Layout

Allocation of Primary Partitions


Now, we have 2 precious primary partitions to allocate to demanding operating systems after we decided to keep one System Recovery partition and one extended partition. Such demanding OS's include Microsoft Windows and *BSD (i.e. NetBSD, OpenBSD, FreeBSD, etc). Since people using *BSD are very hard to find, I assume you'll use both of the two primary partitions for Windows installations, for example, one for Windows 7 and the other for Windows Vista. In my case, I will reserve one primary partition for OpenBSD and another for Windows Vista Home Premium since I use OpenBSD, though not as often as Linux.


My Partition Table

Space reserved for Vista/Win7 Boot Codes


When Vista is installed on a fresh new hard drive, the first NTFS partition is created starting at the 2048th sector. However, to reserve space for Vista boot codes, I will create the first primary partition beginning at the 96390th sector.


Extended Partition


The extended partition can contain an unlimited number of logical partitions. Therefore, inside the extended partition, I am free to install as many OS's as I wish if there's enough space. I can install Windows XP or a variety of Linux distributions on logical partitions. The first logical partition (/dev/sda5) should be a Linux swap partition because it is the place that should rarely change or move.


To Do


  • Write about shared User data partition for multiple Windows OS's
  • Setting up Read-only Linux partition and Changeable Linux partitions with the help of Unionfs

Installing and Booting Windows XP on a Logical Partition

WARNING: Although this post is about Windows, the instruction involves the use of Linux software, such as GParted partitioning tool and GRUB boot loader. If you are not familiar with these Linux tools, please be careful when following the instructions below. I'll add non-Linux instructions to this post later.


You can download Live CD's containing GParted from the following locations:


Copying Windows XP to a Logical Partition using GParted


It is possible to boot Windows XP from a logical partition. First, install Windows XP to a primary partition. Boot your PC with Parted Magic or SystemRescueCD. Start GParted and copy the Windows XP partition to an empty space in the extended partition. You may have to create an extended partition first and then reserve a space inside the extended partition large enough for the new logical partition.


Fixing BOOT.INI for the Windows XP logical partition


Don't reboot yet. Mount the new logical partition containing a copy of Windows XP. To do so, start an Xterm and type something like:


mount -t ntfs-3g /dev/sda5 /mnt
vim /mnt/boot.ini

The BOOT.INI file should be modified so that it points to the new logical partition. Read this article to learn about its format.


[boot loader]
timeout=0
default=multi(0)disk(0)rdisk(0)partition(5)\WINDOWS
[operating systems]
multi(0)disk(0)rdisk(0)partition(5)\WINDOWS="Microsoft Windows XP Professional" /fastdetect /noexecute=optin

Save the BOOT.INI file and reboot.


Changing the Drive Letters with Windows Registry


Reboot with the Parted Magic or SystemResueCD again. When you're at the GRUB boot menu, press C to exit the menu and manually enter GRUB commands. You need to boot to the XP logical partition:


root (hd0,4)
chainloader +1
boot

Right after entering the boot commands, press and hold the F8 key. You'll be shown the Windows XP boot menu. Choose "Safe Mode" to boot to the Windows safe mode. Once inside the safe mode, change the drive letters with the Windows registry editor (regedt32.exe). Reboot to the XP logical partition using GRUB, this time in the normal mode. Check if Windows XP works normally. You can make sure that you're really using the logical partition by reading the C:\BOOT.INI file.

Tuesday, September 8, 2009

Setting Up Windows Vista/7 on Toshiba Mini NB205

Toshiba NB205 comes pre-installed with Windows XP. I wiped out windows XP from the netbook and installed both Windows Vista Home Basic and Windows 7 Home Premium. I will use Windows Vista as my primary workspace and Windows 7 as my experimental workspace.


Installation of Windows Vista requires the SATA driver to be installed at the partition selection step (See the picture below). Download f6flpy3289 from Intel and unpack it onto a USB floppy or a USB thumb drive. Plug it into a USB port, click Load Driver and choose Intel(R) ICH7M/MDH SATA AHCI Controller. If you don't load the SATA driver, Vista will crash after reboot. This problem doesn't happen with Windows 7.


Load Driver for Widows Vista installation

This post serves as a journal I keep in order to keep track of the installed software and configuration. It'll ease the task of reinstalling Windows Vista or Windows 7.


  1. Drivers and Utilities


  2. Windows Update


    If you don't want to wait for Windows to update itself, download the following service packs and hotfixes.


  3. Applications


Related Posts


Wednesday, September 2, 2009

Flash Player 9.0.x For Slow CPU's and Windows 9x/ME

If you use an old computer and the Web seems too slow because of demanding flash videos, get Flash Player 9.0.x. Flash Plash 9.0.x is also the recommended version for Windows 98 and Windows ME. Filehippo provides download links for Flash Player 9.0.x.


About This Blog

KBlog logo This blog seeks to provide a collection of interesting pictures found on the Web. Thanks for visiting the blog and posting your comments.

© Contents by KBlog

© Blogger template by Emporium Digital 2008

Followers

Total Pageviews

Powered By Blogger